Ditching the Box: The Unbeatable Joy of Homemade Toaster Strudels
Forget everything you thought you knew about convenient breakfast pastries. While those store-bought boxes might hold a nostalgic place in your pantry, they simply can't compare to the magic of truly *homemade toaster strudels*. Imagine golden, flaky pastry pockets, bursting with your favorite sweet filling, all crafted with love in your own kitchen. This isn't just about recreating a classic; it's about elevating your grab-and-go breakfast experience into something truly extraordinary.
Many home bakers shy away from pastries, intimidated by complex techniques or the perceived need for store-bought puff pastry. But what if we told you that achieving that delightful flakiness from scratch is not only achievable but also incredibly rewarding? Our recipe for homemade toaster strudels focuses on building a simple yet effective dough that delivers a tender, layered texture that far surpasses anything you'll find in the freezer aisle. Plus, by making them yourself, you control every ingredient, opening the door to endless customization and even catering to dietary needs, including delicious dairy-free options for everyone to enjoy. Get ready to transform your mornings with these delightful pockets of goodness – once you go homemade, there's no going back!
The Secret to Success: Crafting Flaky Dough from Scratch (No Puff Pastry Needed!)
The cornerstone of any outstanding toaster strudel is its dough. While many recipes opt for pre-made puff pastry, our approach takes you back to basics, creating a dough that is not only incredibly flavorful but also surprisingly simple to master. The beauty of this method lies in its ability to produce a wonderfully flaky, tender crust without the extensive steps of traditional laminated dough.
To begin, you'll combine your dry ingredients – typically flour, a touch of sugar, and a pinch of salt. The next crucial step involves incorporating cold butter. Instead of fully mixing it in, you'll want to *crumble* the butter into the dry ingredients using a fork, your fingertips, or a pastry cutter. The goal here is to leave small, pea-sized pieces of butter distributed throughout the flour. These pockets of butter are what create the steam during baking, separating the layers of dough and giving our strudels their signature flakiness.
Once the butter is incorporated, you'll gradually add cold milk, a little at a time, until the dough just comes together. Be careful not to add too much; you want a cohesive, firm dough that isn't sticky, as this will make rolling much easier. The true genius of this dough, however, comes in the subsequent folding and rolling. Unlike traditional bread dough, you're *not* kneading here. Instead, you'll roll the dough into a rough square, fold it in half, and then fold it in half again. Repeat this process several times – at least five – rolling it out each time. This action is crucial for developing those desirable layers without the fuss of traditional puff pastry. It creates thin sheets of dough separated by the butter, resulting in a beautiful, airy texture once baked. After several folds and rolls, the dough will be visibly "layery," ready to be rolled out thinly for your strudels.
Filling Fantasies: Endless Possibilities for Your Homemade Strudels
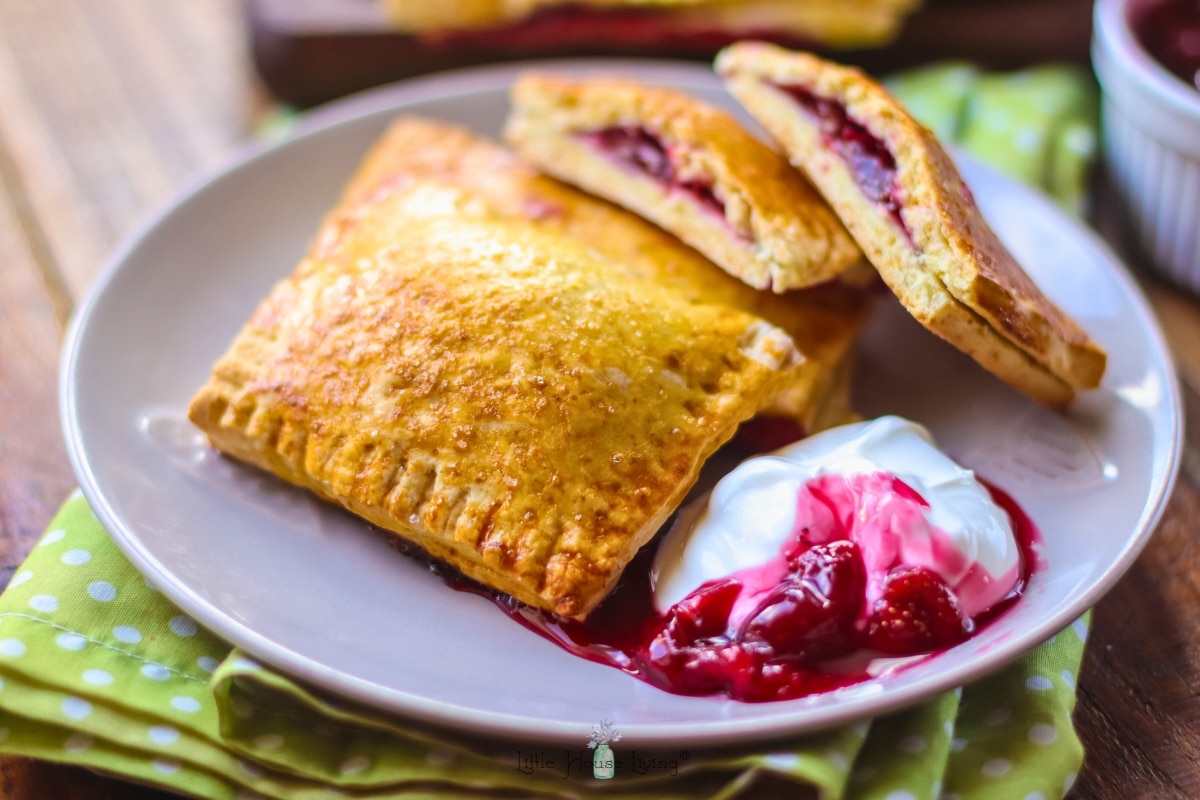
Once you've mastered the art of our flaky dough, the fun truly begins with choosing your fillings. This is where homemade toaster strudels shine, offering a level of customization that store-bought versions can only dream of. The reference context suggested classic fruit-based fillings like applesauce, jams, or pureed fruit, which are always a hit. But why stop there?
Let your imagination run wild! For a quintessential sweet experience, consider a homemade berry compote (strawberries, blueberries, or raspberries), a spiced apple filling reminiscent of apple pie, or even a luscious cherry or peach preserve. If you’re looking for something richer, a dollop of Nutella, a creamy cinnamon-sugar mixture, or a sweet cream cheese filling can turn your strudels into an indulgent treat. Lemon curd offers a zesty contrast, while a simple mixture of brown sugar and cinnamon creates a comforting, classic flavor. For those who appreciate a touch of autumn, a pumpkin spice filling can be absolutely divine.
When preparing your filling, remember a few key tips:
*
Consistency is Key: Ensure your filling isn't too runny, or it might seep out during baking. If using fruit, consider cooking it down slightly to thicken it.
*
Don't Overfill: While tempting, too much filling can make sealing difficult and lead to burst strudels. Leave a small border around the edges.
*
Cool Fillings: If you're cooking your filling, allow it to cool completely before spooning it onto the dough. Hot filling can melt the butter in the dough, compromising its flakiness.
With a little creativity, your homemade toaster strudels can become a delightful canvas for any sweet craving, making each batch a unique and exciting breakfast adventure.
Assembling, Baking, and the Final Flourish: Achieving Golden Perfection
With your perfectly layered dough and delicious filling at the ready, it's time to bring your homemade toaster strudels to life. This stage is all about precision and care to ensure beautiful, intact pastries.
First, roll out your prepared dough very thinly into a large, even rectangle. Then, cut it into smaller rectangles, approximately 5"x6" in size. Place half of these rectangles on a baking sheet lined with parchment paper. This prevents sticking and makes cleanup a breeze. Now, spoon about 1-2 tablespoons of your chosen filling into the center of each dough rectangle, leaving a clear margin around the edges. Remember, less is often more here to prevent leaks.
Next, carefully place a second dough rectangle on top of each filled piece. To seal the strudels securely, gently press down around the edges, then use the tines of a fork to crimp them closed. This not only creates a lovely decorative edge but, more importantly, ensures the filling stays put during baking. A well-sealed edge is crucial; otherwise, your delicious filling might escape and create a mess.
Before baking, you have an optional step for achieving that signature golden-brown hue. While a simple brush of melted butter (as suggested in the reference) will create a nice puff and a subtle sheen, an egg wash (one egg mixed with a tablespoon of water) provides a deeper, more pronounced golden color and a slightly crispier crust, much like store-bought pastries. Bake your strudels in a preheated oven at 350°F (175°C) for approximately 20 minutes. They won't necessarily be dark golden brown when they emerge, but they should be beautifully puffy and cooked through. Once baked, transfer them to a wire rack to cool slightly before the final delightful touch.
Make-Ahead Magic & Drizzle Delights: Enjoying Your Homemade Toaster Strudels Anytime
One of the greatest advantages of making *homemade toaster strudels* is the ability to prepare them in advance, transforming them into the ultimate convenient breakfast. The reference context highlights this perfectly: once baked, these pastries are ideal for freezing. Simply allow them to cool completely, then place them in an airtight freezer-safe bag or container. They can be stored in the freezer for up to a month, ready to be grabbed on busy mornings.
When hunger strikes, reheating is a breeze. While they are called "toaster strudels," the reference correctly notes that conventional toasters can be messy. For the best results – a warm, flaky crust and a perfectly heated filling – we recommend reheating them in a toaster oven or a regular oven at 350°F (175°C) for 5-10 minutes, or until warmed through. This method preserves their texture and prevents filling blowouts. For more comprehensive tips on preparing and storing these delightful pastries, check out our guide on
Easy Make-Ahead Toaster Strudels: Dairy-Free Options.
No toaster strudel is complete without its signature sweet drizzle! This simple frosting is the final flourish that takes your homemade creation to the next level. Combine powdered sugar with a splash of vanilla extract and a small amount of milk (or a dairy-free alternative). Mix until you achieve a smooth, pourable consistency. A key tip from the reference: *do not apply the drizzle before storing them*, especially if you plan to freeze them. The frosting can become hard and difficult to reheat, and it also tends to melt and absorb into the pastry. Instead, apply the drizzle just before serving your warm strudels for that perfect, glossy finish. For more insights on achieving that ideal pastry texture and maximizing flavor, explore our article on
Better Than Boxed: Oven-Baked Toaster Strudels Recipe.
Conclusion: Elevate Your Breakfast with Homemade Toaster Strudels
Embarking on the journey to create *homemade toaster strudels* is more than just baking; it's an investment in superior taste, endless customization, and the pure satisfaction of a truly from-scratch breakfast. By mastering a simple yet effective flaky dough, experimenting with a myriad of delicious fillings, and perfecting the art of assembly and baking, you unlock a world of flavor that store-bought options simply cannot match. From the comforting aroma that fills your kitchen to the first bite of warm, sweet, layered goodness, every step of this process is a rewarding experience. So, ditch the box, unleash your inner baker, and discover the unbeatable joy of your own freshly made toaster strudels. Your mornings, and your taste buds, will thank you.